


Supported Video Sources
EyeStage™ requires an IPEVO Camera connected to the PC (USB or Wi-Fi). Other video sources that can be selected in EyeStage™:
- Built-in cameras
- USB webcams (from other manufacturers)
- Virtual cameras
- Screen sharing

Image Settings

In image settings you can find zoom, focus control, image rotation, mirroring, keystone correction, and LED light switch*. You can also apply virtual backgrounds to your video, or adjust image properties, such as brightness, saturation, sharpness, or exposure.
*For IPEVO cameras equipped with an LED light.

AI Recognition and Digital Zoom for Immersive Conferencing
Choose one of the four AI video frames and use them to create an immersive video experience for any video conferencing scenario.
*Each applied AI Frame increases the system performance requirement, which might result in a lagging image. It is recommended to use AI Frame only for a single video source.

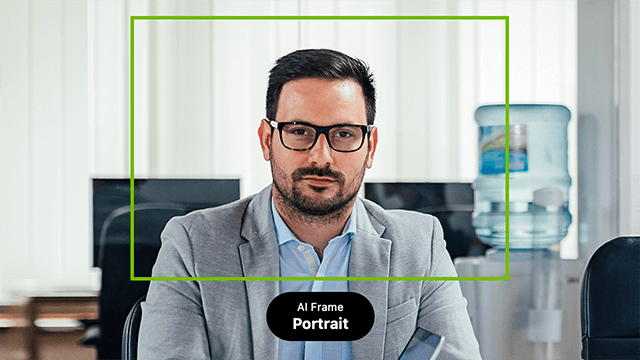
Portrait Mode
In this mode, the AI automatically tracks the “portrait” area of the person in front of the camera and adjusts the image accordingly, based on three different scenarios.
*The green areas demonstrate the three different scenarios the AI can detect.
Single Person
AI zooms in and places the person in the center of the image.


Single Person - Profile View
The AI pans the image in the direction the person is facing and includes the whiteboard in the frame.


Multiple People
AI zooms in and makes sure every participant stays in the frame.


Conferencing Mode
The AI automatically splits the image into individual portrait images (of 1 to 4 people) and zooms in on each.
*When too close to each other, only one of the people might get captured in the split image.


Panoramic Conferencing
The individual portrait images are combined with a panoramic view of the meeting room.
*When too close to each other, only one of the people might get captured in the split image.

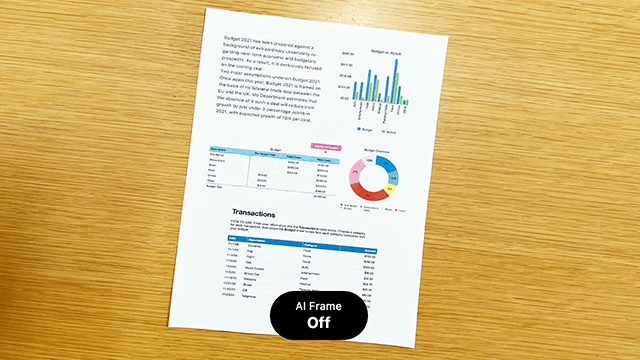
Document Mode
A mode with automatic cropping, which removes the extra area around the borders of the scanned document.

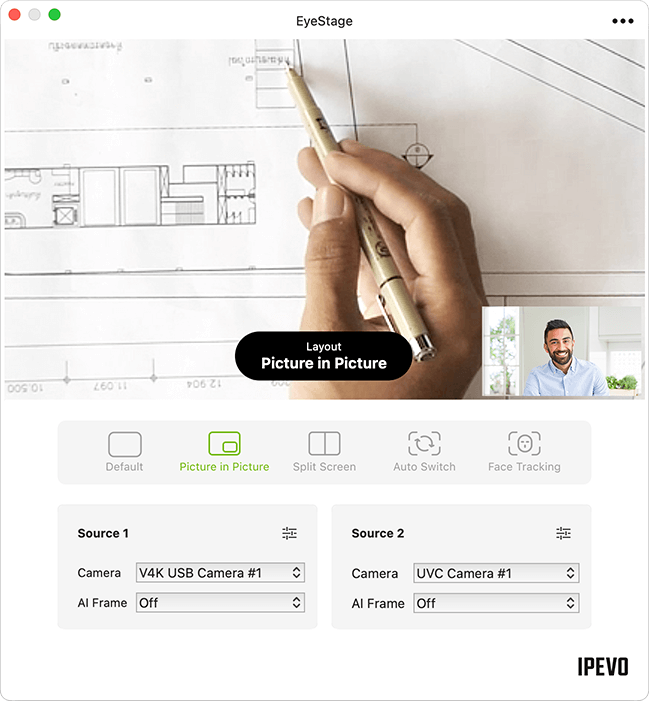
Display Modes
There are five display modes to choose from. These display modes can combine two video sources in one, which can then be used in an online conferencing app.
Default Mode
This mode displays video from a single camera source. You can still use two cameras and switch between them manually.


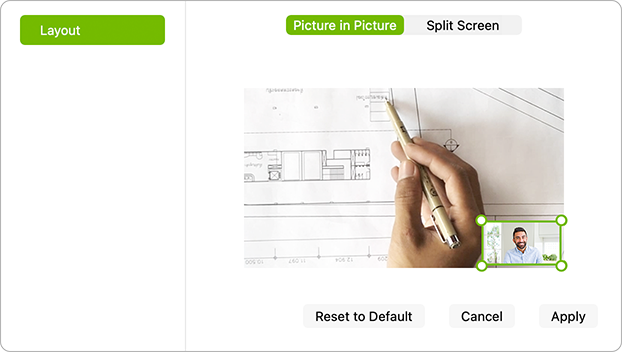
Picture in Picture
Both video sources are displayed simultaneously, with Source 2 serving as the Picture-in-Picture. The PiP window can be resized and repositioned in the Preferences section of Settings.
Split Screen
Splits the screen in two, with the video from Source 1 displayed on the left and Source 2 on the right. The dividing line can be moved horizontally in the Preferences section of Settings.

How to adjust PiP and Split Screen


Auto Switch
Automatically switches between two camera sources whenever detecting the “portrait” area of a person. If a person is detected in both video sources, the current image will remain on the screen.


Face Tracking
Select a face to track, and EyeStage™'s AI will automatically switch to the video source where this face was detected. If the selected face is not found for more than 10 seconds, EyeStage™ will switch to the camera source which detects a person.

